VMware Workstation Pro is a virtualization software (hosted on Windows and Linux) that allows users to run virtual machines, containers, and Kubernetes clusters. It's quite easy to create a new virtual machine in VMware Workstation.
We have two approaches to create a VM in VMware Workstation:
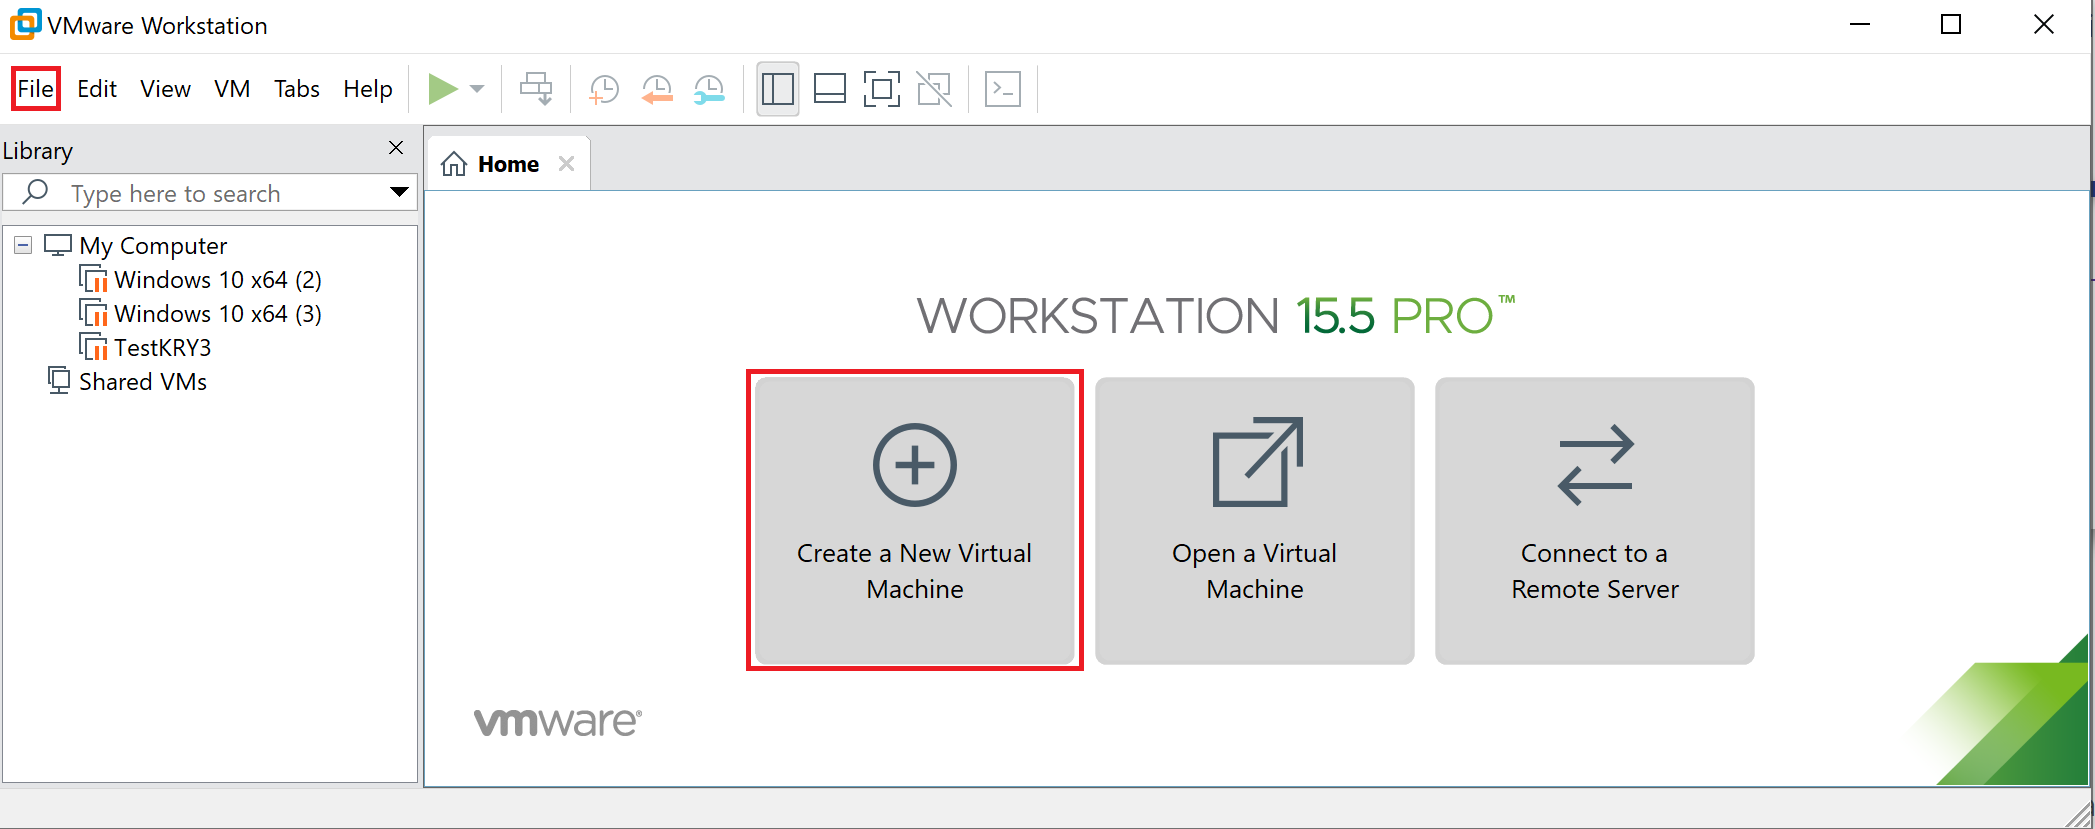
- Select the File menu and select "New Virtual Machine".
- Select "Create a New Virtual Machine" large button.
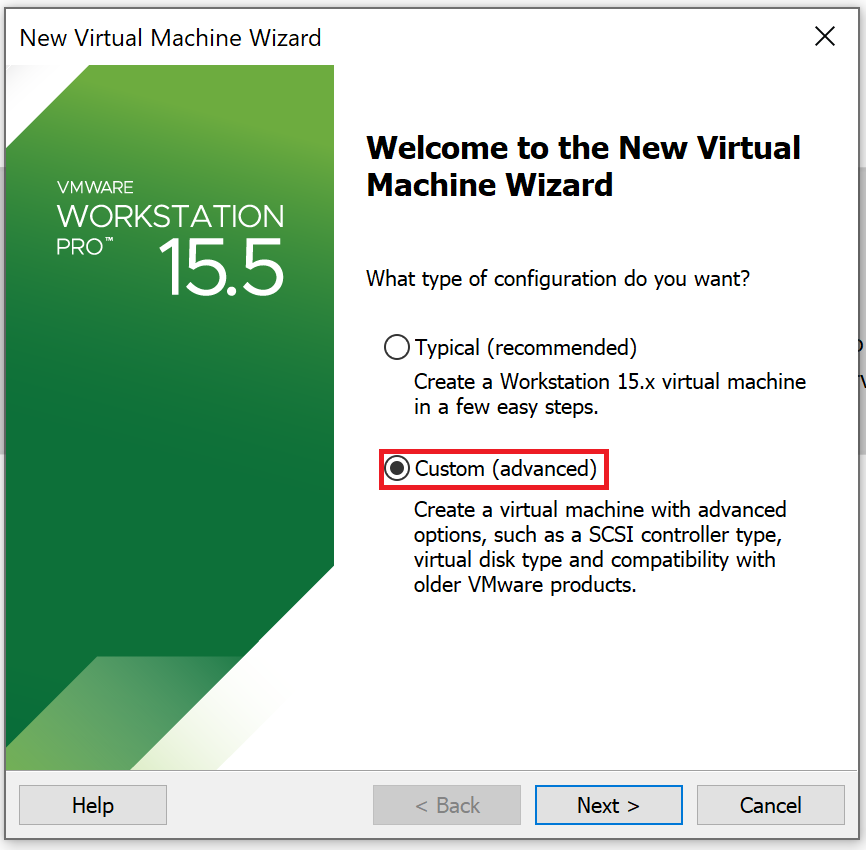
Once again, we will have two types of configurations to create a virtual machine in VMware Workstation. We will choose the custom option to change settings according to our requirements.
- Typical (recommended) — Create a Workstation 15.x virtual machine in a few easy steps.
- Custom (advanced) — Create a virtual machine with advanced options, such as SCSI controller type, virtual disk type, and compatibility with older VMware products.
Step-by-Step: Custom Virtual Machine Configuration
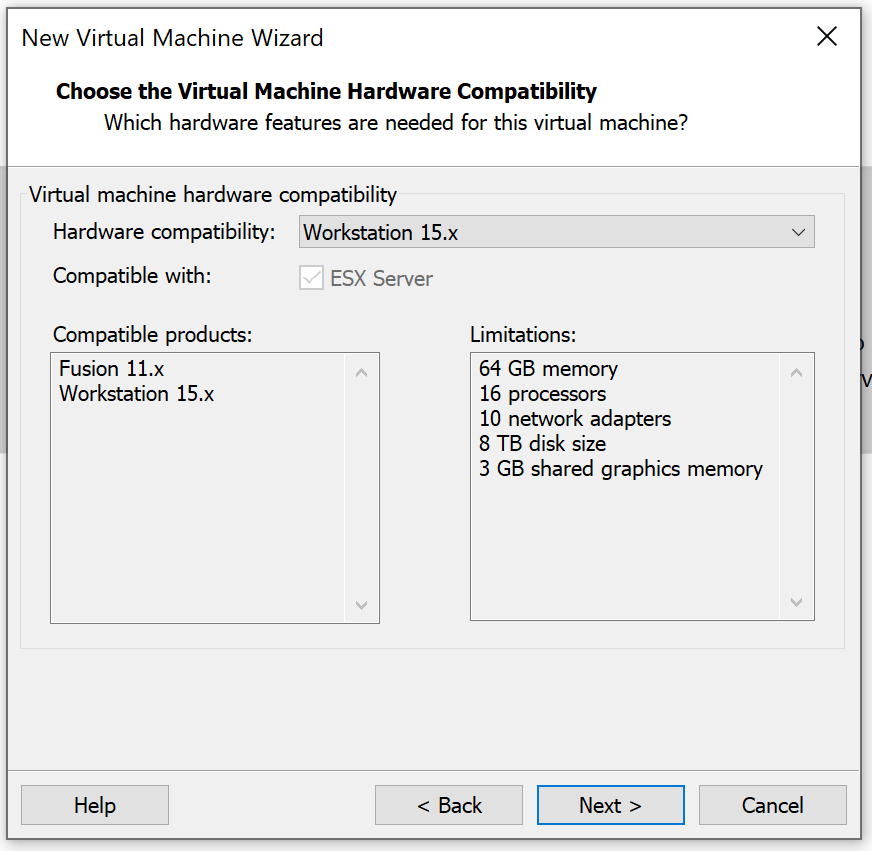
Step 1: Choose the Virtual Machine Hardware Compatibility
We are installing the latest operating system so we don't need to change any option. Select next.
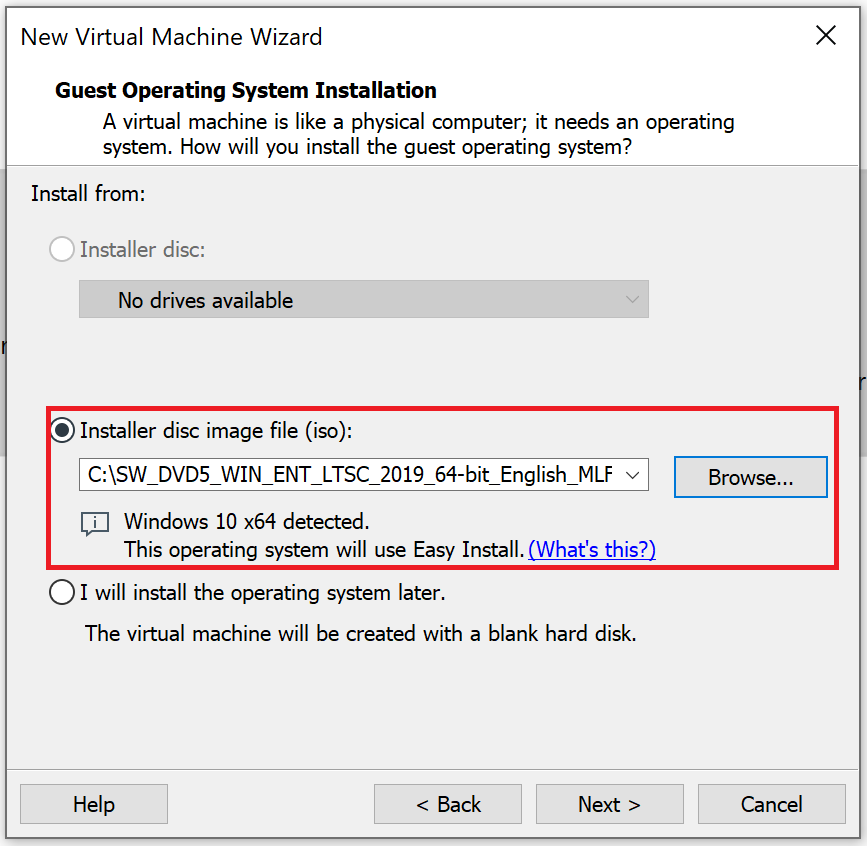
Step 2: Guest Operating System Installation
We can choose whether we want to install an operating system now or later. If you want to install now, then select the browse option and select operating system media in ISO format.
Step 3: Easy Install Information
This is optional to provide this information to automate the installation. If you provide this information, Windows 10 will be installed and activated automatically. We will skip this and select next.

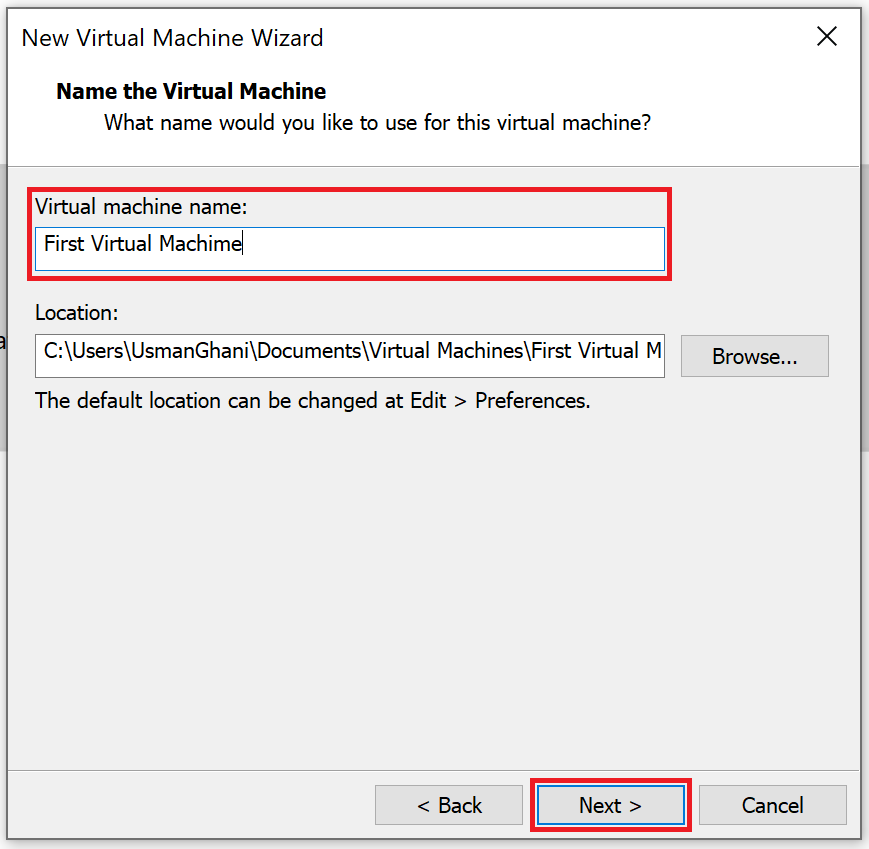
Step 4: Name the Virtual Machine
We need to enter a virtual machine name and location where this virtual machine will be stored. By default, the path is the document folder of the logged in user. We can change this path in the Edit menu by selecting preferences.
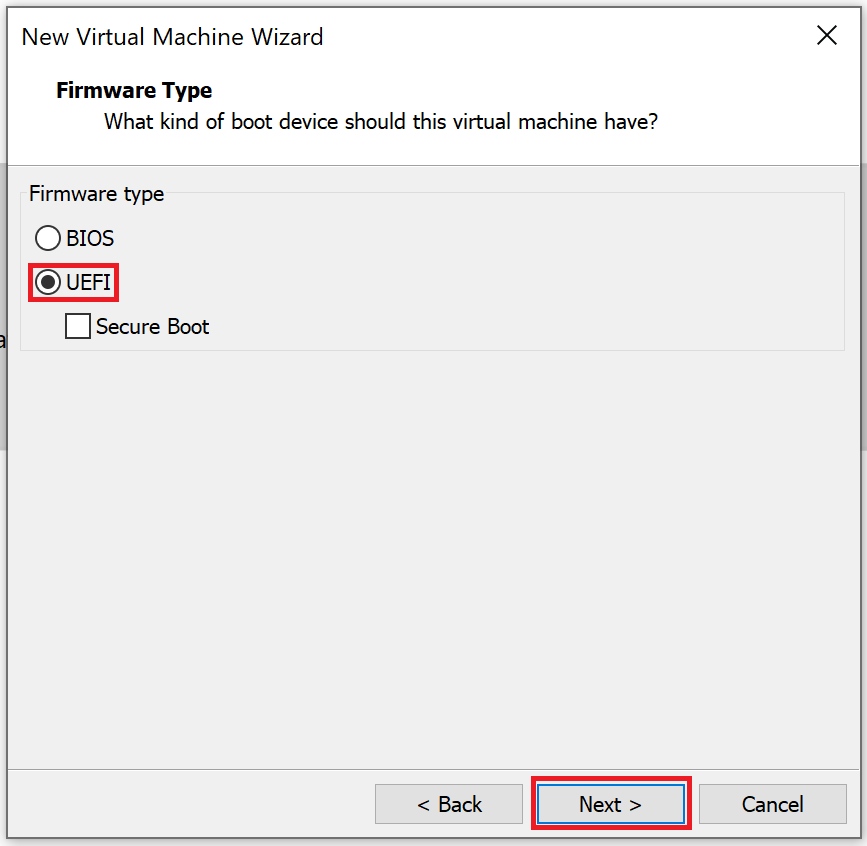
Step 5: Firmware Type
We will select UEFI which is more powerful and has advanced features.
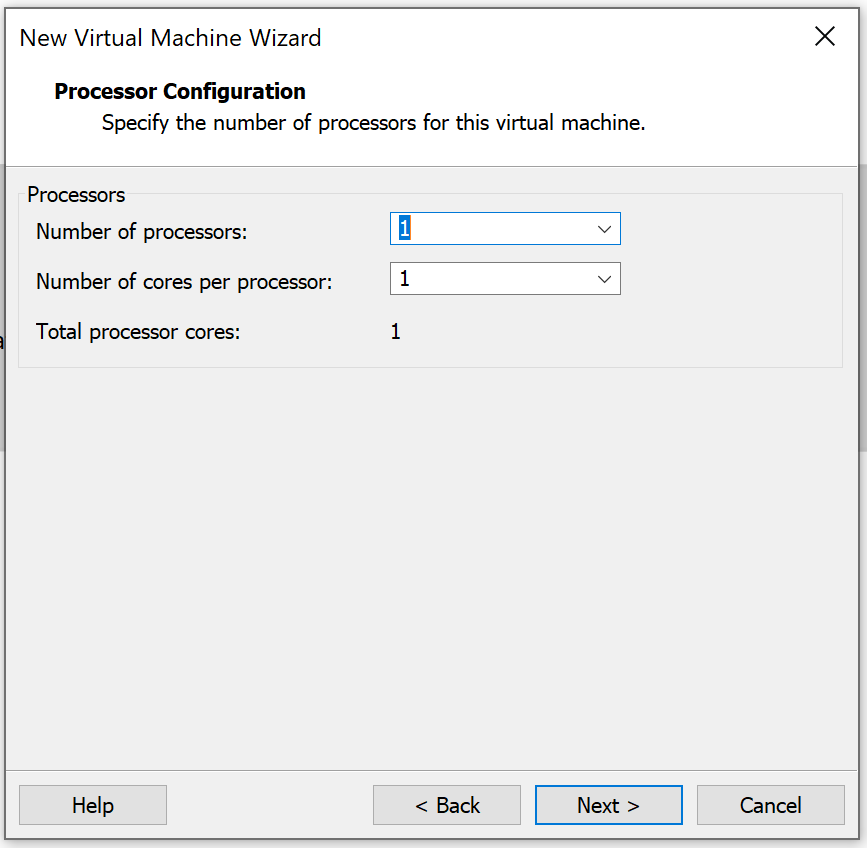
Step 6: Processor Configuration
Select 1 processor core which is quite enough for Windows 10.
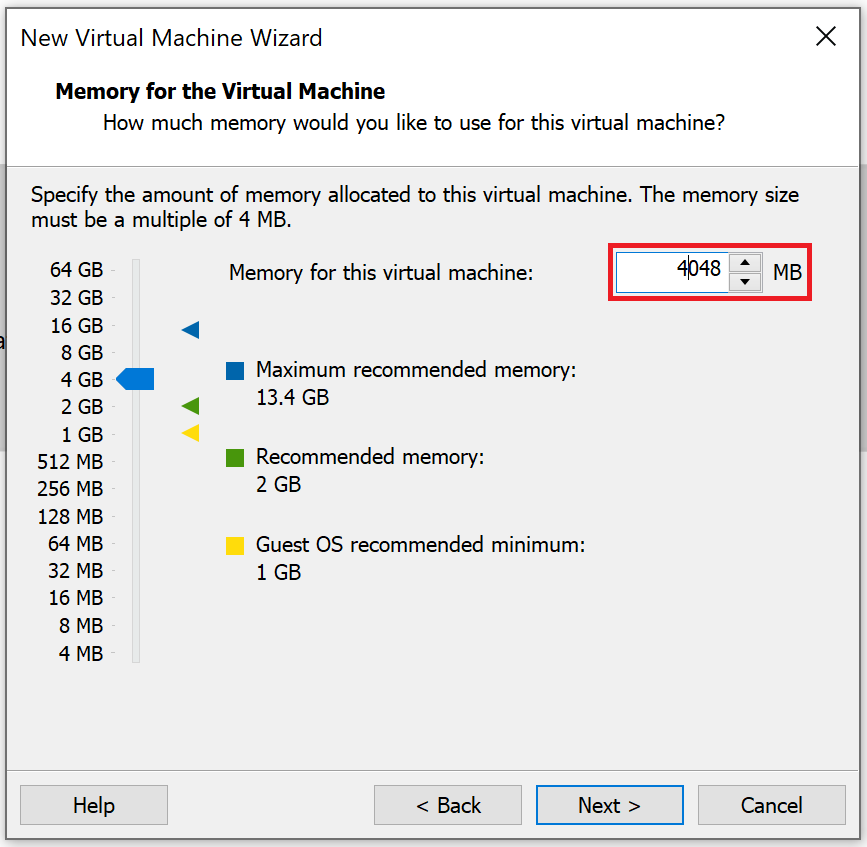
Step 7: Memory for Virtual Machine
We can assign up to 64 GB memory but 4 GB to 8 GB is enough for Windows 10.
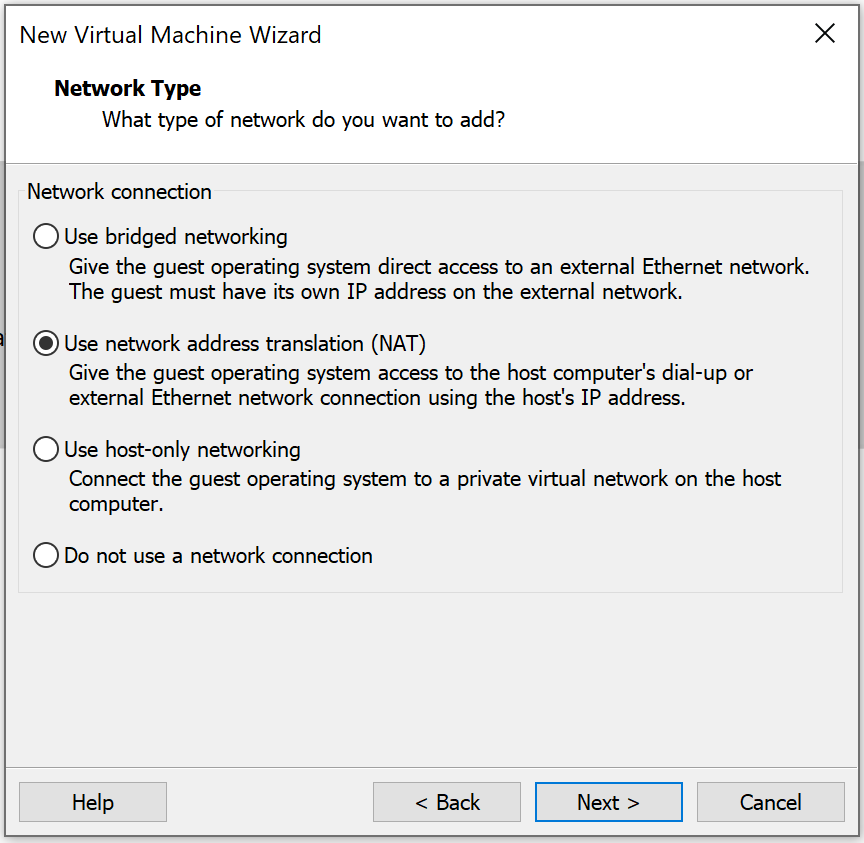
Step 8: Network Type
There are 4 types of networks which you can set up. However, Network Address Translation (NAT) is quite common.
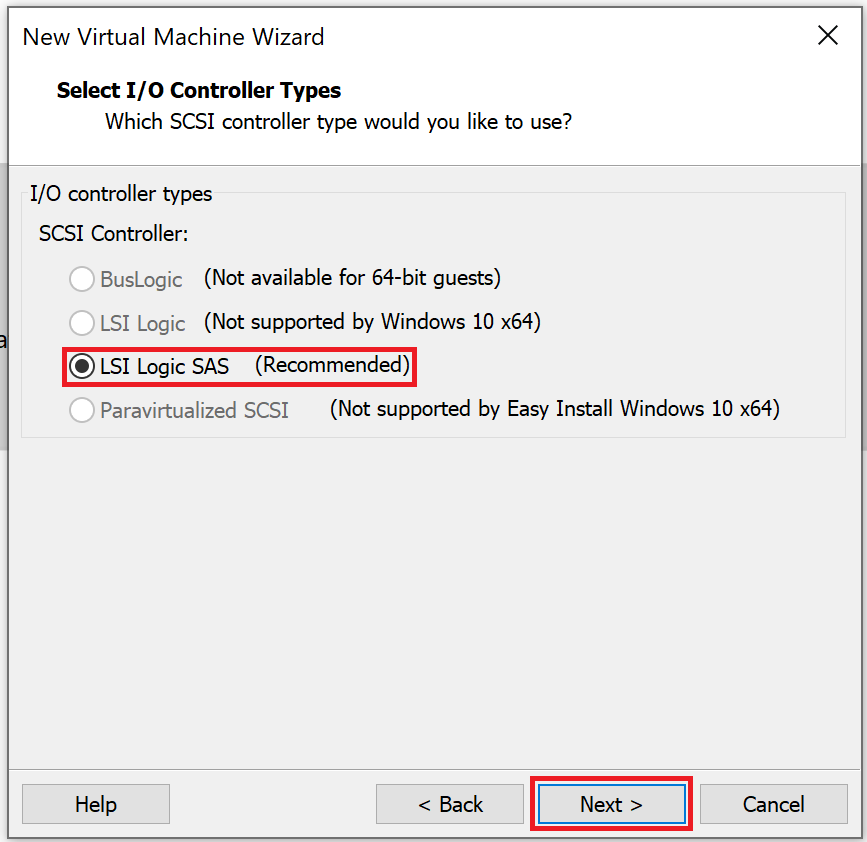
Step 9: Select I/O Controller Types
LSI Logic SAS is recommended for Windows 10 64-bit.
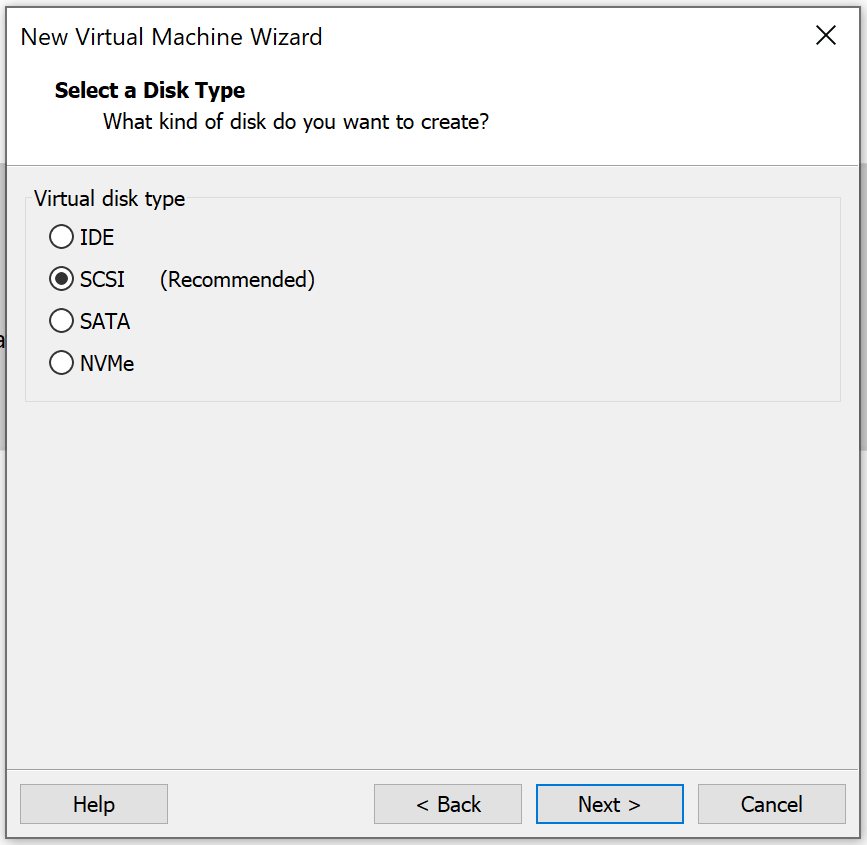
Step 10: Select a Disk Type
There are 5 types of disks, but SCSI is recommended for Windows 10 64-bit.
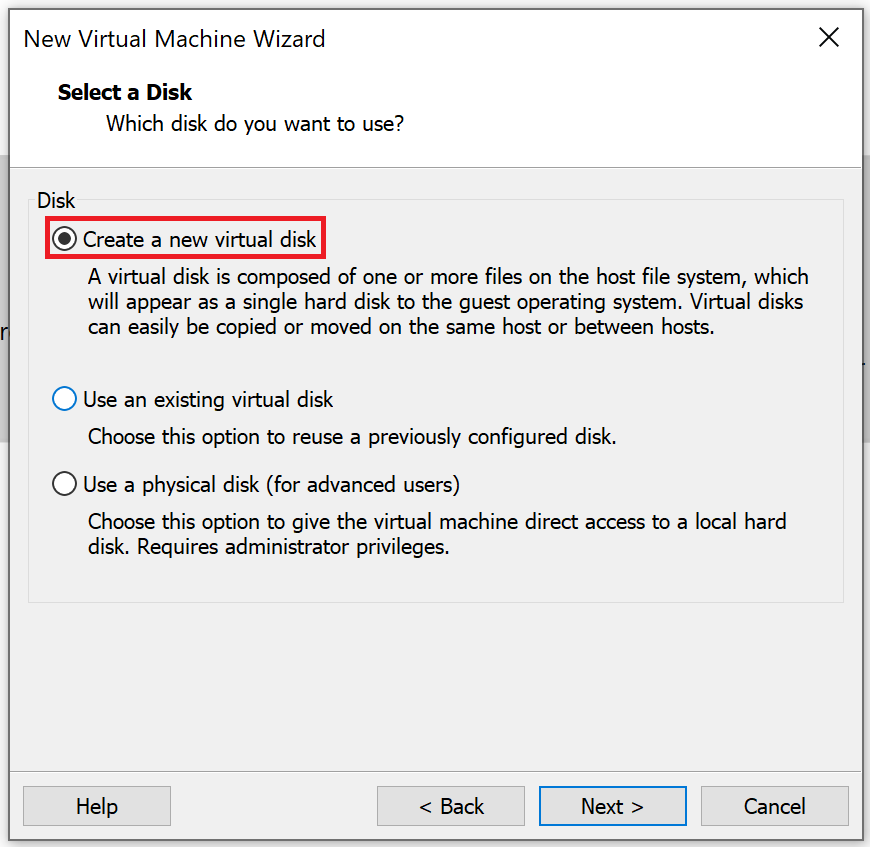
Step 11: Select a Disk
Select "Create a new virtual disk."
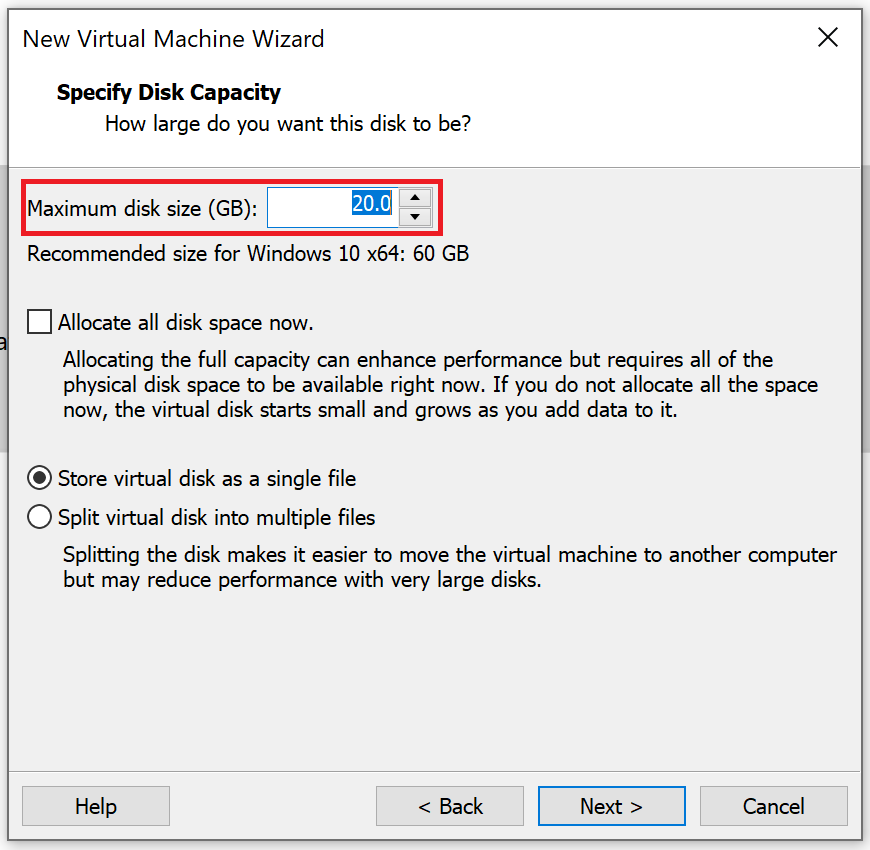
Step 12: Specify Disk Capacity
Here we will assign disk capacity which will be different for each operating system.
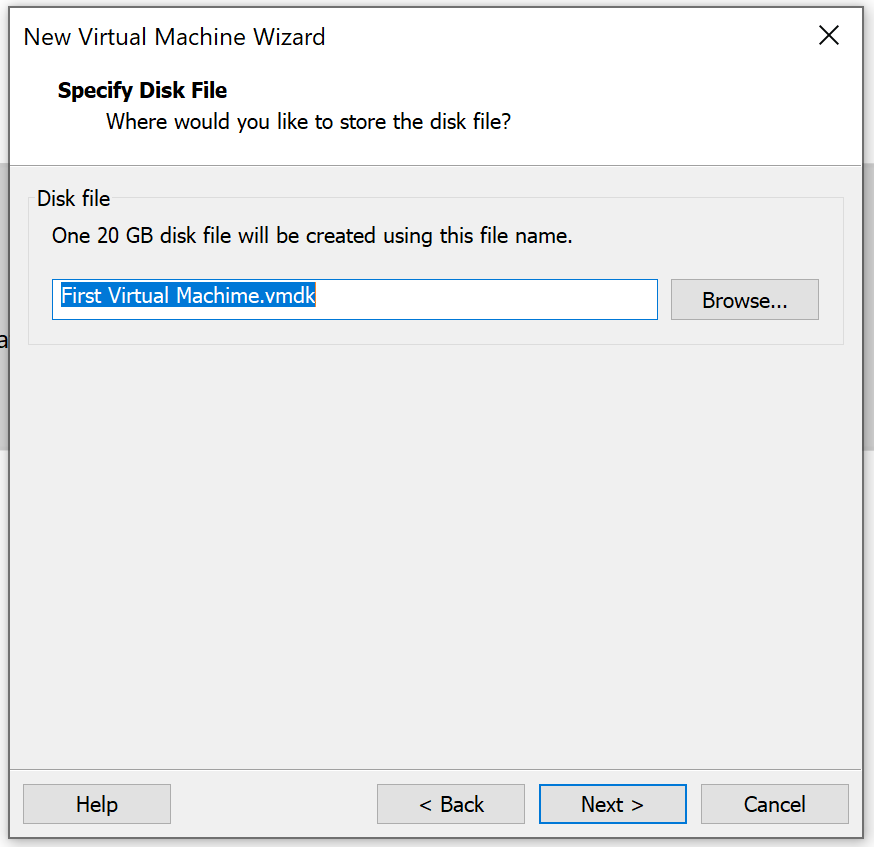
Step 13: Specify Disk File
Disk files are created with the same name as the virtual machine, or you can change it.
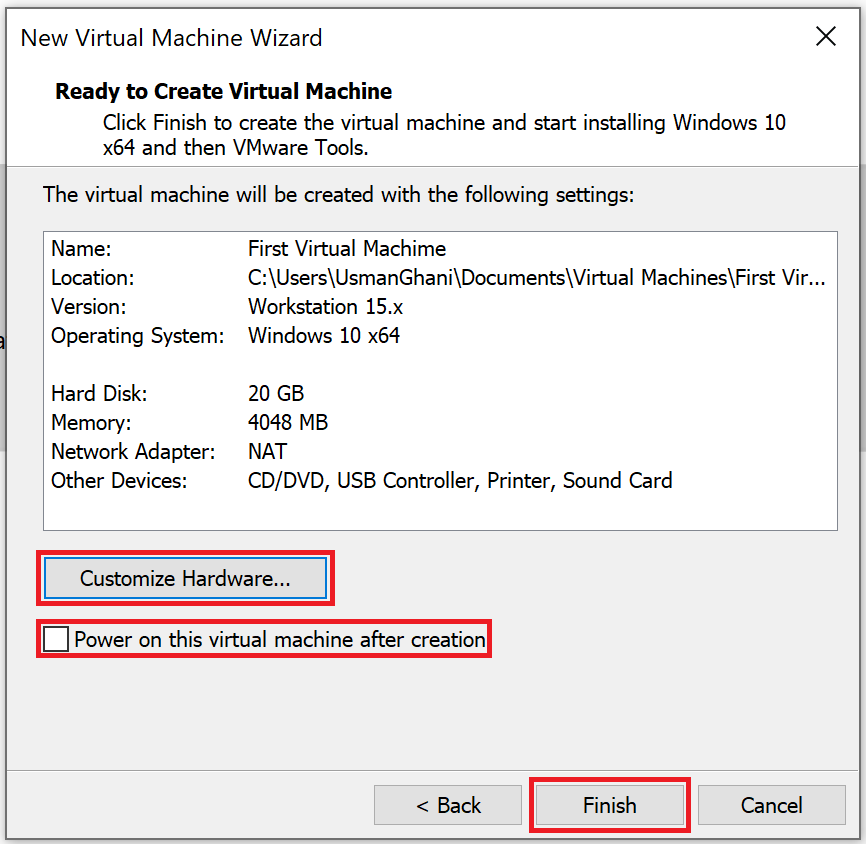
Step 14: Ready to Create Virtual Machine
Here you will find all the details which were required to create a virtual machine. You can also change the hardware settings (select Customize Hardware) such as memory, CPU, hard disk, etc.
Check the option "Power on this virtual machine after creation" if you want to start the virtual machine once created.
A new virtual machine has been created in VMware Workstation and you can start the virtual machine.
Frequently Asked Questions
What are the system requirements for VMware Workstation 15 Pro?
VMware Workstation 15 Pro requires a 64-bit x86 processor with at least 1.3 GHz clock speed, a minimum of 2 GB RAM (4 GB or more recommended), and approximately 1.2 GB of free disk space for the application. You will also need additional disk space for each virtual machine you create.
Can I run multiple virtual machines at the same time in VMware Workstation?
Yes, VMware Workstation allows you to run multiple virtual machines simultaneously. The number of VMs you can run depends on your host system's available resources, including CPU cores, RAM, and disk space. Make sure to allocate resources carefully so the host operating system remains responsive.
What is the difference between Typical and Custom configuration when creating a VM?
The Typical configuration uses default settings and walks you through a simplified wizard, making it ideal for quick setups. The Custom configuration gives you full control over advanced options such as hardware compatibility, SCSI controller type, firmware type (BIOS or UEFI), virtual disk type, and network settings. Custom is recommended when you need specific hardware configurations.
Can I change virtual machine settings after creation?
Yes, you can modify VM settings at any time by right-clicking the virtual machine in the library and selecting Settings. You can change the allocated memory, number of processors, disk size, network adapter type, and more. Some changes require the VM to be powered off before they take effect.
How do I install an operating system on the virtual machine after creating it?
If you skipped the OS installation during VM creation, you can install it later by mounting an ISO file or inserting a physical disc. Go to VM > Settings > CD/DVD, select "Use ISO image file," browse to your ISO, and then power on the virtual machine. The VM will boot from the ISO and start the OS installation process.