AzCopy is a command-line tool for copying data to, from, and between Azure storage accounts. It's the fastest, most reliable way to move large amounts of data into Azure Blob Storage or Azure Files. This guide covers installing AzCopy, authenticating, and using its two core commands — copy and sync — with real examples, including a full walkthrough of syncing a local folder to Azure.
Quick answer: Install AzCopy (
winget install Microsoft.Azure.AZCopy.10), authenticate withazcopy loginor a SAS token, then runazcopy copy "C:\data" "https://<account>.blob.core.windows.net/<container>?<SAS>" --recursive=trueto upload, orazcopy syncto keep a local folder and a container in alignment.
What Is AzCopy?
AzCopy is a free, standalone command-line utility from Microsoft for high-performance data transfer with Azure Storage. v10 is the current supported version, available for Windows, Linux, and macOS. Common use cases are:
- Uploading data from on-premises to an Azure storage account
- Downloading data from Azure back to on-premises
- Copying data between two Azure storage accounts (server-to-server)
- Synchronizing a local folder with a blob container or file share
Because it's a single executable with no installer dependency on Windows, AzCopy is easy to drop onto a server and script.
How to Install AzCopy
Option 1: winget (quickest on Windows)
winget install Microsoft.Azure.AZCopy.10
Option 2: Download the portable binary
Download the AzCopy v10 zip and extract azcopy.exe anywhere (for example, C:\azcopy):
- Windows 64-bit: aka.ms/downloadazcopy-v10-windows
- Linux x86-64: aka.ms/downloadazcopy-v10-linux
- macOS: aka.ms/downloadazcopy-v10-mac
Add AzCopy to your PATH
For convenience, add the folder containing azcopy.exe to your system PATH so you can run azcopy from any directory. If you don't, you'll need to cd into the AzCopy folder and run .\azcopy.exe instead.
Verify the install:
azcopy --version
How to Authenticate AzCopy
Owning the storage account does not automatically grant data access — you must give AzCopy credentials in one of two ways.
Microsoft Entra ID (recommended for automation)
Sign in once and AzCopy reuses the credential for every command — no SAS token to append:
azcopy login
For unattended scripts, authenticate as a managed identity (azcopy login --identity) or a service principal. Check and clear your session with azcopy login status and azcopy logout.
SAS token (simple for one-off transfers)
Append a Shared Access Signature (SAS) token to the storage URL in each command. This is fine for quick jobs, but SAS tokens expire, are hard to rotate, and grant direct access if leaked — so prefer Entra ID for anything recurring.
azcopy copy "C:\data" "https://account.blob.core.windows.net/mycontainer?<SAS-token>" --recursive=true
AzCopy Command Reference
| Command | What it does |
|---|---|
azcopy copy |
Copies data from a source to a destination |
azcopy sync |
Replicates a source to a destination (only transfers differences) |
azcopy make |
Creates a container or file share |
azcopy list |
Lists the entities (blobs/files) in a resource |
azcopy remove |
Deletes blobs or files |
azcopy login / logout |
Signs in to / out of Microsoft Entra ID |
azcopy jobs |
Lists, resumes, and shows transfer jobs |
azcopy bench |
Runs a throughput benchmark |
Get help any time with azcopy -h, or for a specific command, azcopy copy -h. Note that AzCopy has no rename command.
Using azcopy copy
azcopy copy transfers data one way and does not check what's already at the destination — it just copies. Use --recursive=true to include subfolders.
Upload a local folder to a blob container:
azcopy copy "C:\data" "https://account.blob.core.windows.net/mycontainer?<SAS>" --recursive=true
Download a container to a local folder:
azcopy copy "https://account.blob.core.windows.net/mycontainer?<SAS>" "C:\data" --recursive=true
Copy between two storage accounts (server-to-server):
azcopy copy "https://source.blob.core.windows.net/cont1?<SAS>" "https://dest.blob.core.windows.net/cont2?<SAS>" --recursive=true
Filter what gets copied with --include-pattern or --exclude-pattern:
azcopy copy "C:\data" "https://account.blob.core.windows.net/mycontainer?<SAS>" --include-pattern="*.pdf;*.docx" --recursive=true
Using azcopy sync (and copy vs sync)
azcopy sync compares the source and destination and only transfers the differences — new and changed files. This makes repeat runs much faster than copy, which re-transfers everything.
The key behavioral difference people miss is deletion:
azcopy copynever deletes anything at the destination.azcopy syncdoes not delete by default either. To remove files at the destination that no longer exist at the source, you must add the--delete-destinationflag:--delete-destination=true— deletes without prompting--delete-destination=prompt— asks before each deletion--delete-destination=false— the default; never deletes
# Mirror a local folder to Azure, removing files deleted locally
azcopy sync "C:\Upload2Cloud" "https://account.blob.core.windows.net/localfiles?<SAS>" --delete-destination=true
Use copy for one-time transfers and sync when you want to keep two locations continuously aligned (backups, mirrors).
Worked Example: Sync a Local Folder to Azure Blob Storage
Here's the full end-to-end process if you're starting from scratch.
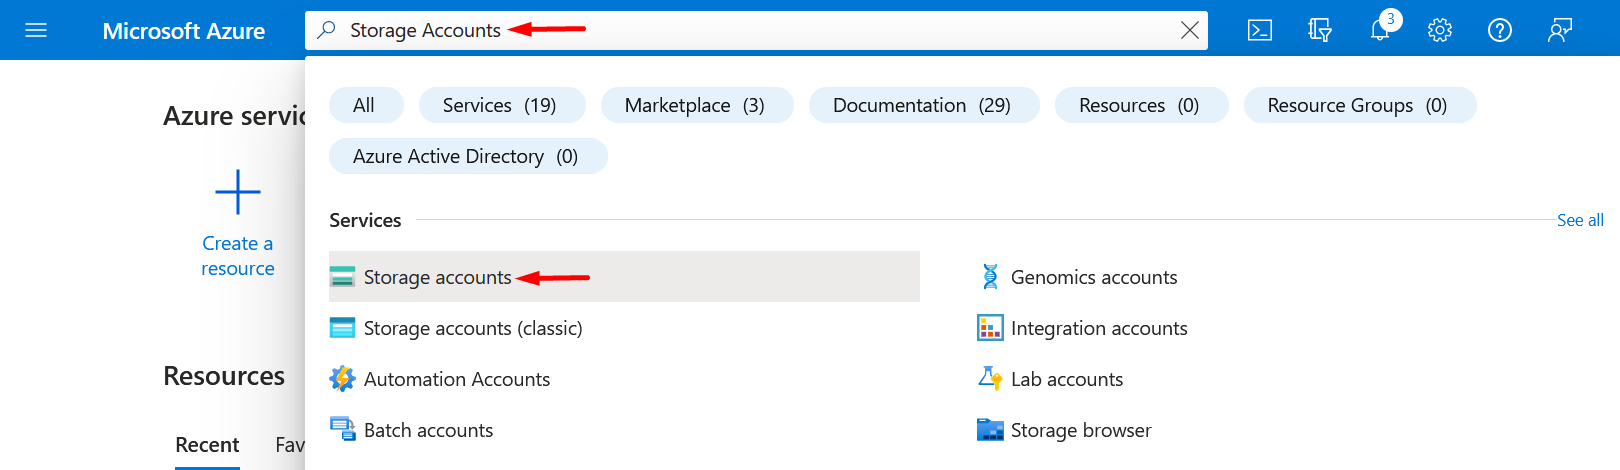
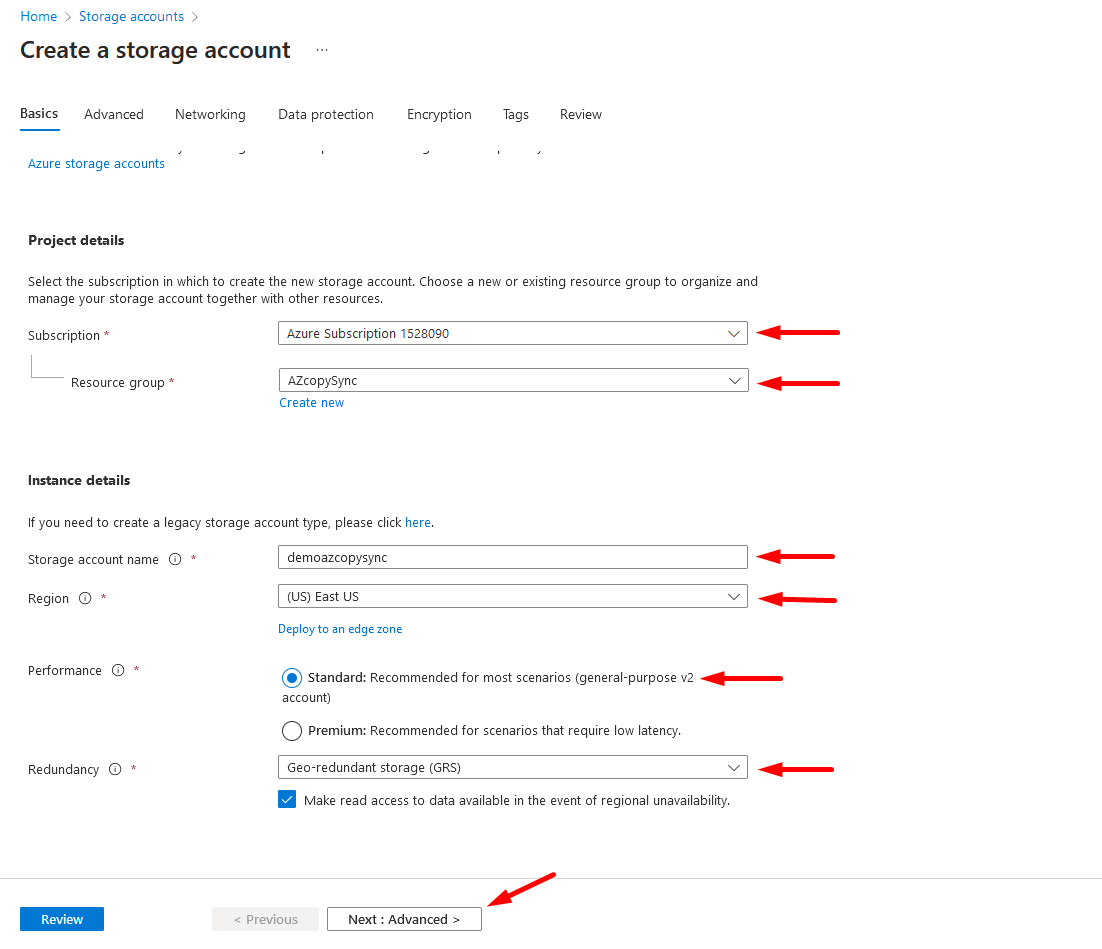
Step 1: Create a storage account
In the Azure portal, search for Storage accounts and click Create.
Fill in the basics — subscription, resource group, a unique account name (lowercase, no spaces), region, performance tier, and redundancy. The remaining wizard tabs (Advanced, Networking, Data protection, Encryption) can be left at their defaults for a standard setup. Click Review + create.
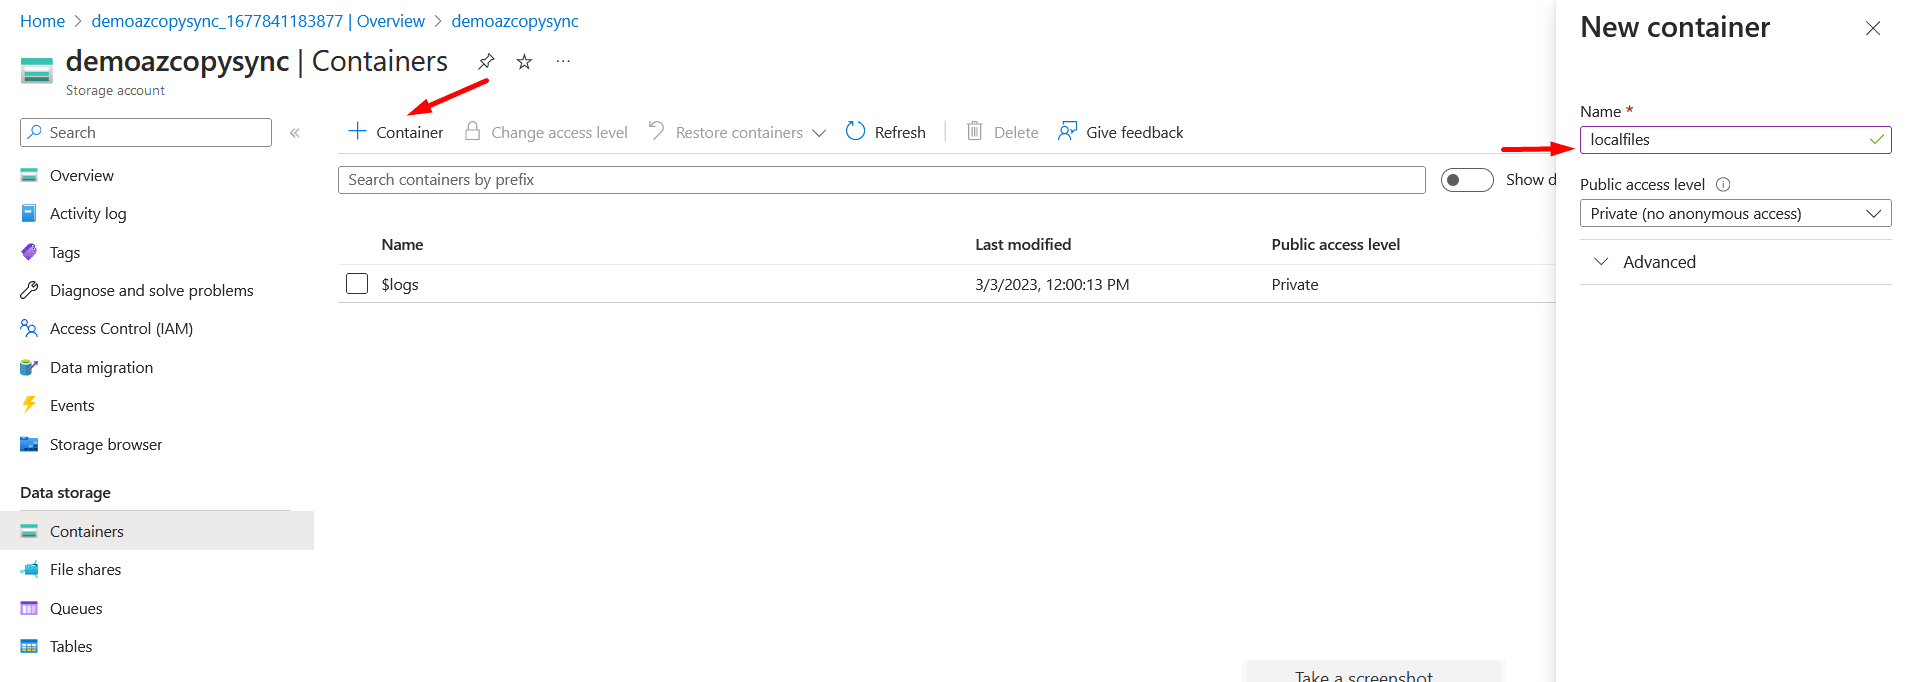
Step 2: Create a container
Open the new storage account, select Containers, click + Container, give it a lowercase name, and click Create.
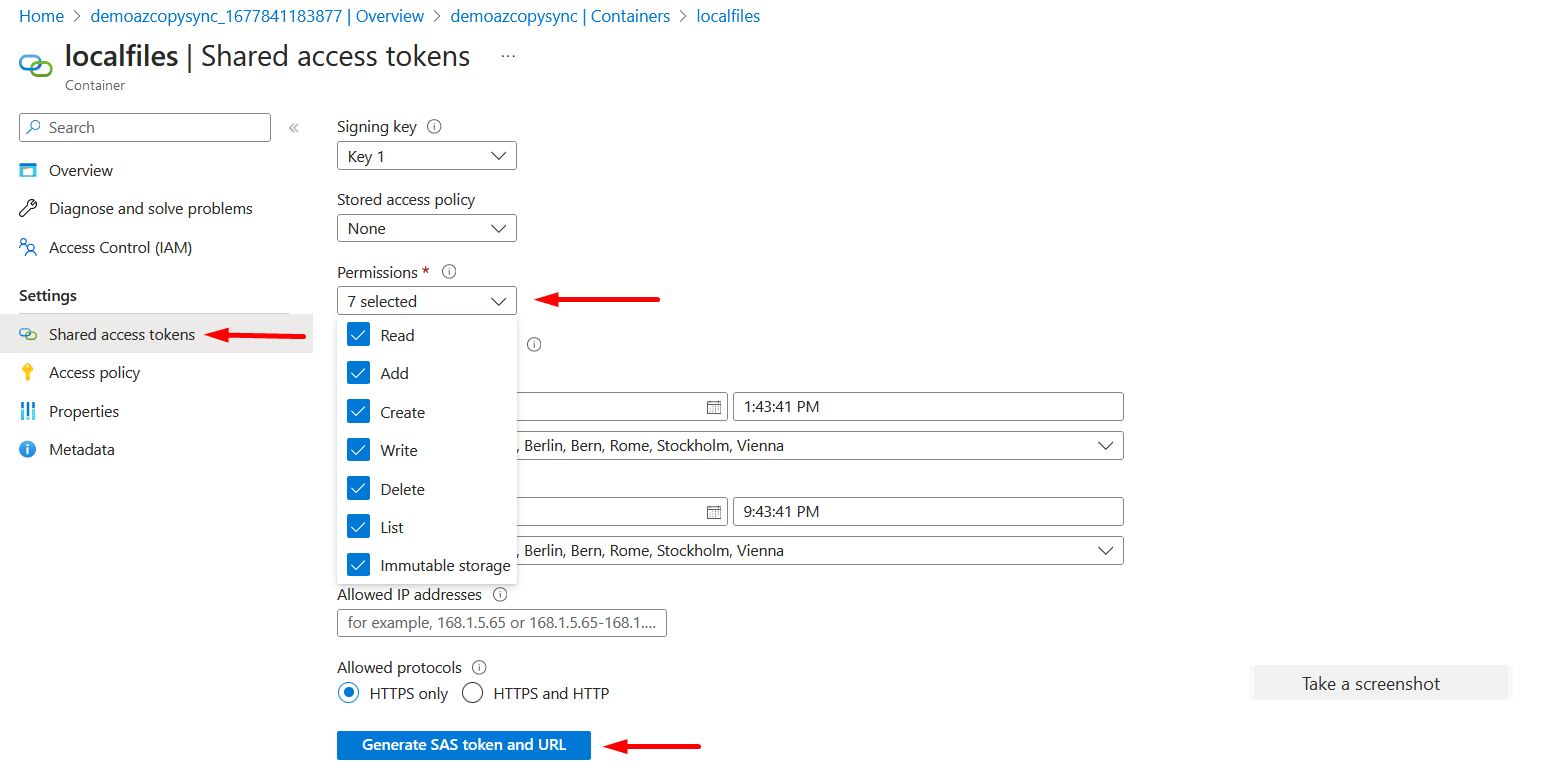
Step 3: Generate a SAS token
Open the container, select Shared access tokens, choose the permissions you need (Read, Add, Create, Write, Delete, List), set an expiry, and generate the token. Copy the Blob SAS URL.

Step 4: Run the sync
Point AzCopy at your local folder and the SAS URL:
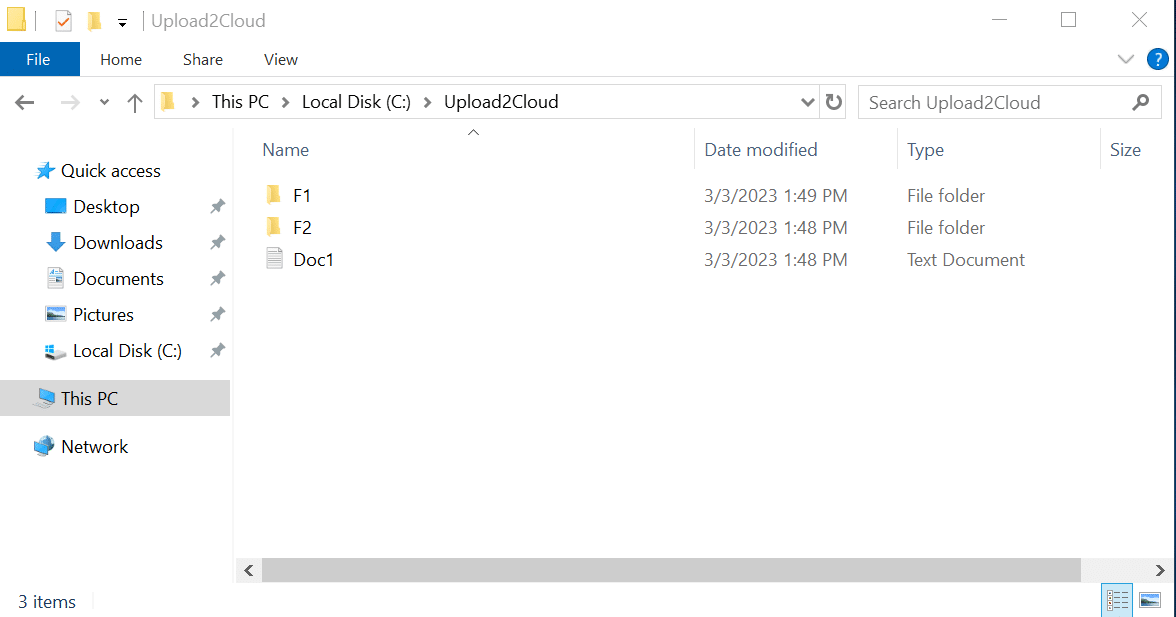
azcopy sync "C:\Upload2Cloud" "https://demoazcopysync.blob.core.windows.net/localfiles?<SAS>"

The first run uploads everything; subsequent runs transfer only what changed.
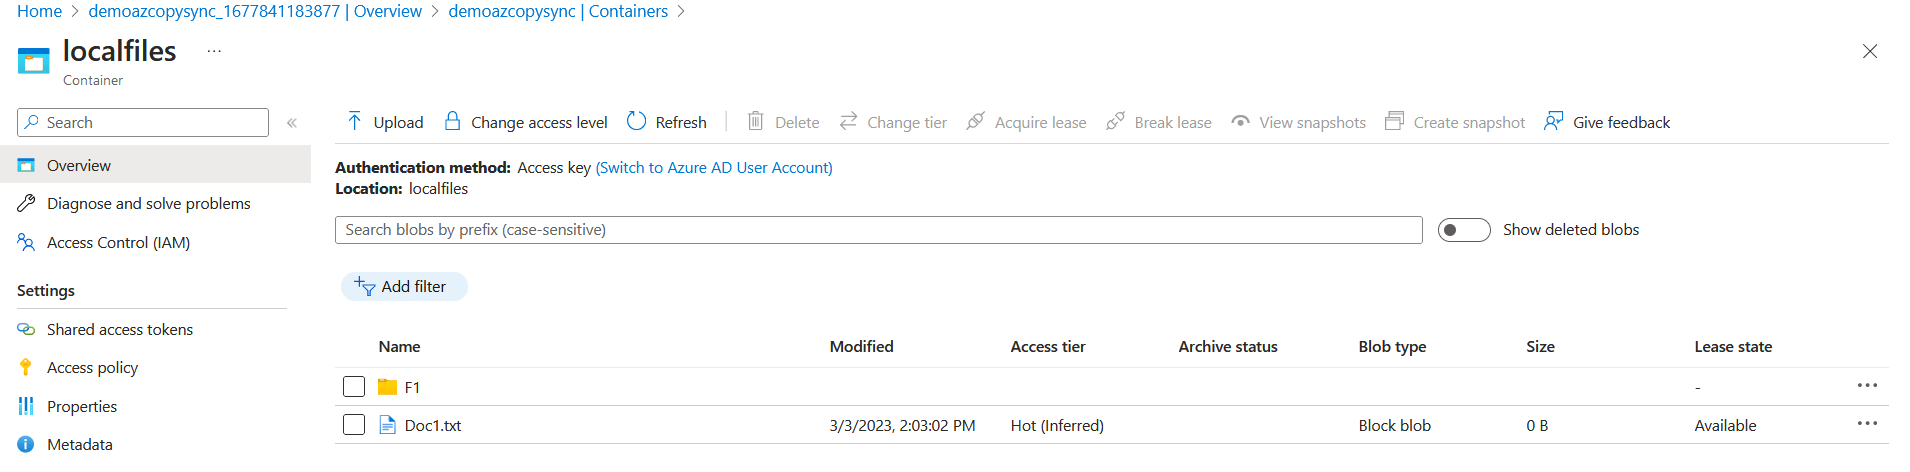
Note: Empty folders are not synced. Azure Blob Storage has no true folder hierarchy — it uses virtual directories derived from file paths — so a folder with no files has nothing to transfer.
Other Useful AzCopy Operations
Create a container or file share:
azcopy make "https://account.blob.core.windows.net/newcontainer?<SAS>"
List the contents of a container:
azcopy list "https://account.blob.core.windows.net/mycontainer?<SAS>"
Delete blobs:
azcopy remove "https://account.blob.core.windows.net/mycontainer?<SAS>" --recursive=true
Azure Files works the same way — just point at a file share URL (https://account.file.core.windows.net/myshare) instead of a blob container.
Improving AzCopy Performance
AzCopy is already parallelized, but you can tune it:
- Concurrency: set the
AZCOPY_CONCURRENCY_VALUEenvironment variable to raise or lower the number of concurrent requests (default is auto-tuned based on CPU). - Throttling: use
--cap-mbpsto limit bandwidth so a transfer doesn't saturate your link.
$env:AZCOPY_CONCURRENCY_VALUE = "64"
azcopy copy "C:\data" "https://account.blob.core.windows.net/mycontainer?<SAS>" --recursive=true --cap-mbps=500
Scheduling AzCopy
To run a sync automatically, put the command in a batch file (.bat) or PowerShell script and schedule it with Windows Task Scheduler (or cron on Linux). For unattended runs, authenticate with a managed identity or service principal rather than a SAS token, so the job doesn't break when a token expires.
Frequently Asked Questions
What is the difference between AzCopy copy and AzCopy sync?
azcopy copy transfers files from a source to a destination without checking what's already there — it re-copies everything each run. azcopy sync compares both sides and only transfers new or modified files, and it can optionally delete files at the destination that no longer exist at the source. Use sync to keep two locations aligned; use copy for one-time transfers.
Does AzCopy sync delete files from the destination?
Not by default. azcopy sync only adds and updates files unless you set --delete-destination=true (delete silently) or --delete-destination=prompt (ask first). The default value is false.
How do I install AzCopy on Windows?
Either run winget install Microsoft.Azure.AZCopy.10, or download the v10 zip from aka.ms/downloadazcopy-v10-windows and extract azcopy.exe. Add its folder to your PATH so you can run azcopy from anywhere.
How do I authenticate AzCopy without a SAS token?
Run azcopy login to authenticate with Microsoft Entra ID. For automation, use azcopy login --identity (managed identity) or a service principal. This avoids appending — and rotating — SAS tokens on every command.
Can AzCopy copy data between two storage accounts?
Yes. Use azcopy copy with two URLs — the source and the destination — each authorized with a SAS token or Entra ID. This is a server-to-server transfer, so the data doesn't pass through your local machine.
Can I schedule AzCopy sync to run automatically?
Yes. Place the AzCopy command in a batch file or PowerShell script and run it with Windows Task Scheduler (or cron on Linux). Use a managed identity or service principal for authentication so scheduled jobs don't fail when a SAS token expires.
Does AzCopy work with Azure File Shares?
Yes. AzCopy supports both Azure Blob Storage and Azure Files. The syntax is identical — point at a file share URL (https://account.file.core.windows.net/myshare) instead of a blob container.
Why are empty folders not synced by AzCopy?
AzCopy operates at the file level, and Azure Blob Storage has no real folder hierarchy — it uses virtual directories based on file paths. An empty folder contains no files to transfer, so it's excluded.